A Scrap Yarn Sweater, Luxury Edition

[advertisement: unpaid links]

First, I have to admit I finished this one about a year ago, wore it all winter and forgot to blog about it. Today, I have started to wear it again so I better tell you about it right now.

I decided to knit this sweater as an experiment on how to use up several black sock yarn leftovers from different brands at once. Of course, there were some differences in colour and texture, so I held them together with a neon blue Kidsilk yarn from my stash which I never would have used on its own. The result just looks stunning with the marled effect of the two yarn types together. As a plus, you only feel the softness of the Kidsilk yarn on your skin, there is no itchyness of the sock yarn involved.

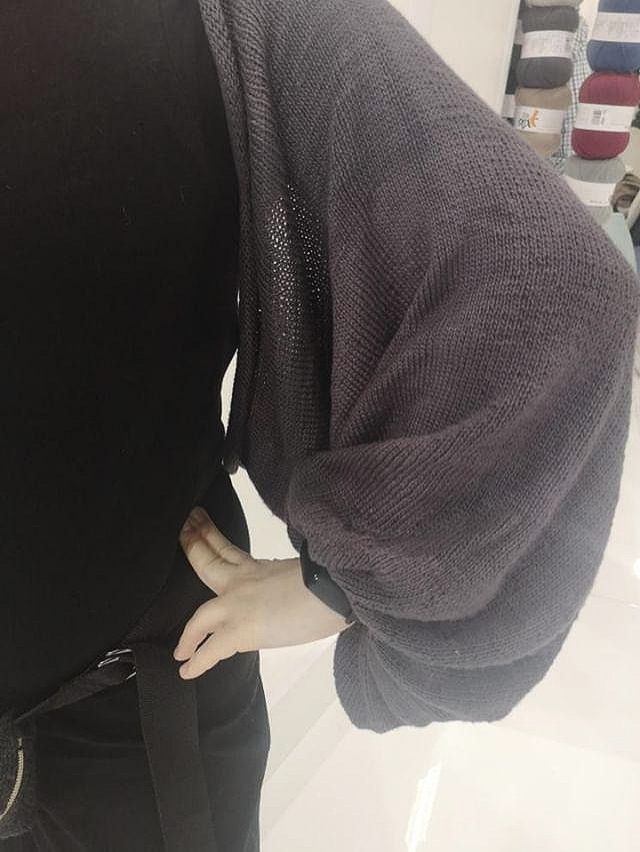
The pattern used is Top-Down Top by Anna & Heidi Pickles, a cleverly constructed, batwing sleeved sweater. It is super easy to follow and quick to knit on 5.5 mm needles. It is knit top-down in one piece with minimal finishing. The batwing sleeves end around the elbows and the waistline, respectively, followed by tight ribbing to make it a long-sleeved, hip-length sweater. This makes it very comfortable to wear as you can still fit into a regular coat. Perfect!

The blue yarn, by the way, is Kid Seta by Madil Yarns. In my opinion, the quality of this yarn is outstanding with long fibre lengths and extreme softness. It is a pleasure to knit and wear. I am really sad this yarn is discontinued.

However, this sweater already has become a winter wardrobe favourite. It is lightweight, yet warm and can be styled in a million ways from casual to glamorous. Maybe I should mix up leftover and unloved yarns more often.

How to Sew Yourself a Bra

[advertisement: unpaid links]

I am wearing a non-standard bra size which is not available in Germany in case I insist on a modern/ lacy/ not-you-grandma style within a limited budget. I usually order my bras from the UK where sizes for full-breasted women are a lot easier to find. But when it comes to stylish soft bras, things get a lot more complicated.

As this year’s WGT is approaching and I plan to wear some tops with extra large armholes, I need something nice to wear underneath. While browsing sewing patterns, I stumbled upon Emerald Erin’s Jordy Bralette which is a pretty simple design that showcases your cloth perfectly. I turned a non-stretch, olive cotton sateen into a stunning result that sadly is unwearable.

The two cups are attached to an elastic band which is closed with hooks and eyes on the back. In my opinion, this construction makes the pattern not suitable for larger breasts as it lacks the support needed. The straps cannot compensate this. Another weakness of the pattern is that you can of course try on the cups before attaching them to the underbust elastic and straps, but you will not know if this bralette works for you until you have finished it. What a pity!

Before I could work myself up into frustration, I decided to try out Madalynne’s Barrett Bralette pattern. Before starting, I had done a little research if it was suitable for larger breasts and had found some projects that looked quite good. First, I cut and sewed the cups only from leftover scuba cloth. The largest size had a good fit, but the scuba did not give enough support for a 34F bra size. Next, I sewed the cups in a glittery, black cotton sateen containing 5% spandex. This cloth is totally not intended for lingerie, but was the perfect solution to my problem. As the barrett pattern is designed as a pull-on bra without back closure, I had to improvise a back closure due to an intended lack of elasticity. This meant finding the right back band length for my hook and eye closure (the 3XL back band was way too long!) and reshaping the back band to fit the side cup seams on the one side and my closure on the other. In fact, I just drew a line and cut away a triangle for a fast and easy solution. And here it is, my custom-sized, dark disco bralette.

I know that there are a lot of visible mistakes. I also could have added a lining as the pattern suggests, but this version will do for the moment. There still is room for improvement, but I have enough fabric left to sew myself another one. This, by the way, leads to my conclusion on how to sew a bra: just start and iterate the fit until you like it. And please, start with leftover fabric as the first try might not necessarily lead to a wearable result. 🙂

New Knitting Pattern: Sleeves

[advertisement: yarn sample, unpaid links, my own business]

I like the idea of shrugs to add sleeves to a sleeveless top on chilly summer evenings. The problem I have with them is that the connection between the sleeves covers the back of the top underneath. As it always looks ridiculous when you pair a shrug with a dramatic top, I decided to find a solution to my problem.

What I wanted was a pair of dramatic sleeves held together in a minimalist way. When I was still figuring out the details, I was given three balls of GGH Bambu for free at Yarncamp 2018 which turned out to be the perfect yarn with its wonderful drape. It was clear that I needed more yarn, so I bought seven more balls.

gathered sleeve

The result is a pair of extremely oversized balloon sleeves, held together by a steel chain at the neck and two i-cords to adjust the fit at your lower back:

© ggh-garn.de
© ggh-garn.de

You can buy the pattern on Ravelry. I am looking forward to see your interpretations!

The sample used almost ten balls of GGH Bambu in colourway 012 anthracite. Thanks a lot for providing the photos, ggh-garn.de!

skull cord ends